This has been such a satisfying week! But first, can I just say there are a ton of incredible projects going on for the One Room Challenge. I can’t even imagine doing a complete kitchen makeover in 6 weeks. Or a complete basement, new walls and all. It’s so exciting to follow all of these!
Amid all of the renovation fun, our pups celebrated birthday number three this week! I don’t think they realize anything though. Other than enjoying their extra treat after dinner and their new little plush toys. But happy birthday pups!
Kona with her birthday treat.Loki loved his new toy – he didn’t even rip out the stuffing or squeaker! Yet.As far as the laundry area goes, we have been hard at work. I get to do all of the fun parts, while the hubby basically solves any problems we come across. I was able to clear out the working area and get all of my materials so I could start installing some fake shiplap. We have shiplap!!! And it’s amazing! But before starting we had to take care of some other very important details. First, I did a few loads of laundry. Hopefully the washer and dryer can be hooked up within a couple of days and it won’t really be an issue, but I wanted to make sure we had at least some clean clothes.
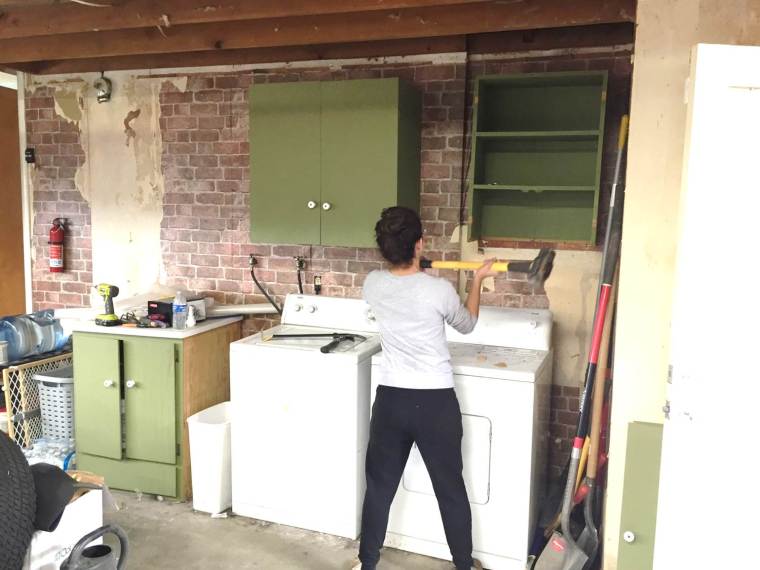
Them came demo! I was originally planning on saving the upper cabinets since they were a good size and pretty sturdy. I took the doors off nice and neat, but nothing else was budging. I couldn’t even find all of the screws. Then I realized how cheaply constructed they were. The backs were just thin veneer, and there were two slats that held up each cabinet. The hubby then entered the garage with the sledge hammer, reminding me of all of the HGTV shows I watch. So I went to town! I was pretty nervous (our washer and dryer were still running…right under the cabinets), but it was so satisfying! I think I would make the Property Brothers proud. The hubby did help me out a bit though. I was so scared of the cabinets falling on my feet and all of the finishing nails coming at me. Simply terrifying.
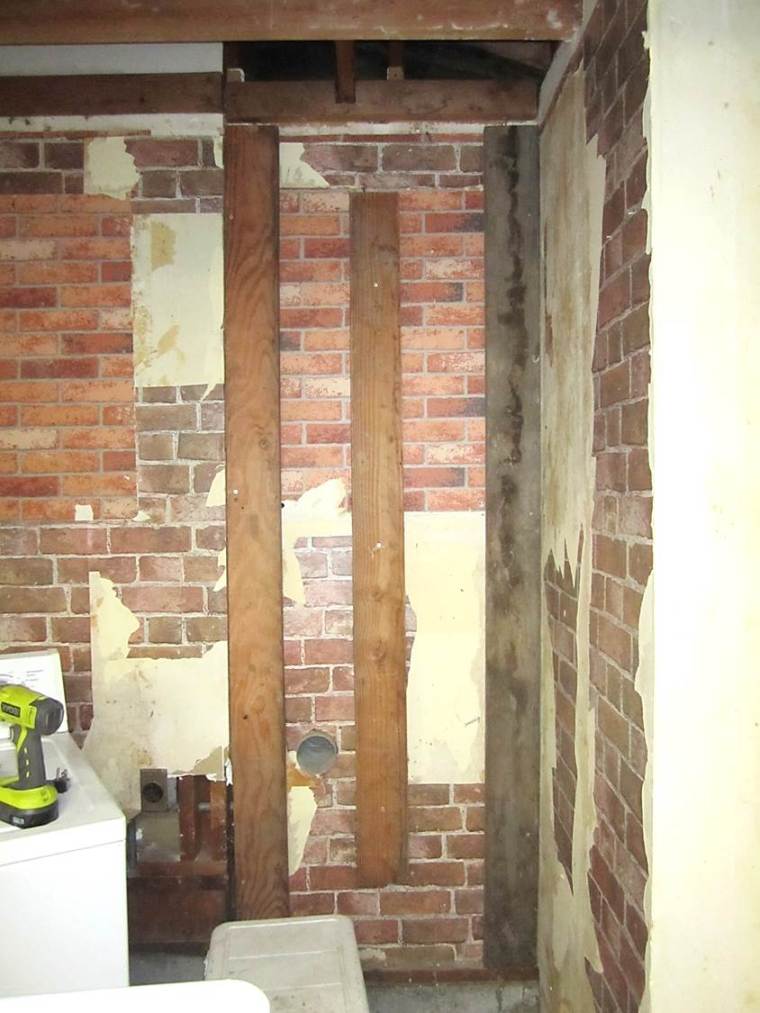
First swing!Buh bye cabinets!Next up was leveling out the wall. On the right edge of the garage there is about a 2-inch setback in the wall. This is apparently where the house ends. Totally did not pick up on that. Since we were planking the wall, we didn’t need to really go all out on leveling it. After moving away the washer and dryer, I just took a few scrap 2x6s (that had been at the house since before we moved in) and spaced them across the area. Since this is where the dryer vent is located, the hubby was able to extend the vent into the garage just a tiny bit more. We wanted to make it easy to change out the dryer duct in the future. Easy peasy, lemon squeazy.
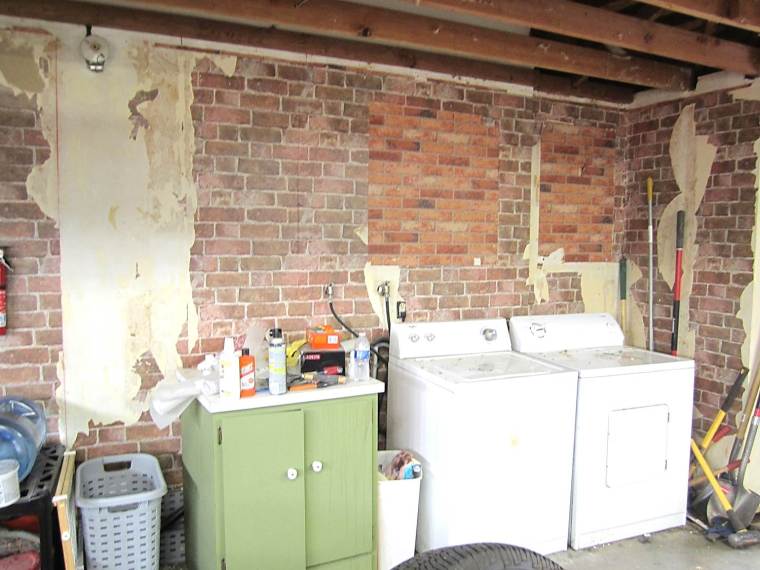
That wall paper…it haunts me in my dreams.I then stated removing all of the attachments hung on the wall (garage door opener and such, very simple stuff). There was a weird looking attachment right near the door going into the kitchen, and we had no clue what it was. After consulting the hubby’s dad, we learned that it was the door bell. You would think we could figure this stuff out by now… The hubby unattached it and was planning on running it through the upper beams so that it would hang from the eventual ceiling, but it turned out that the wiring was all too short. He recessed the electrical box so it didn’t stick out quite so far into the garage, and then reinstalled it. I’m thinking we will have to get clever with some sort of cover for it.
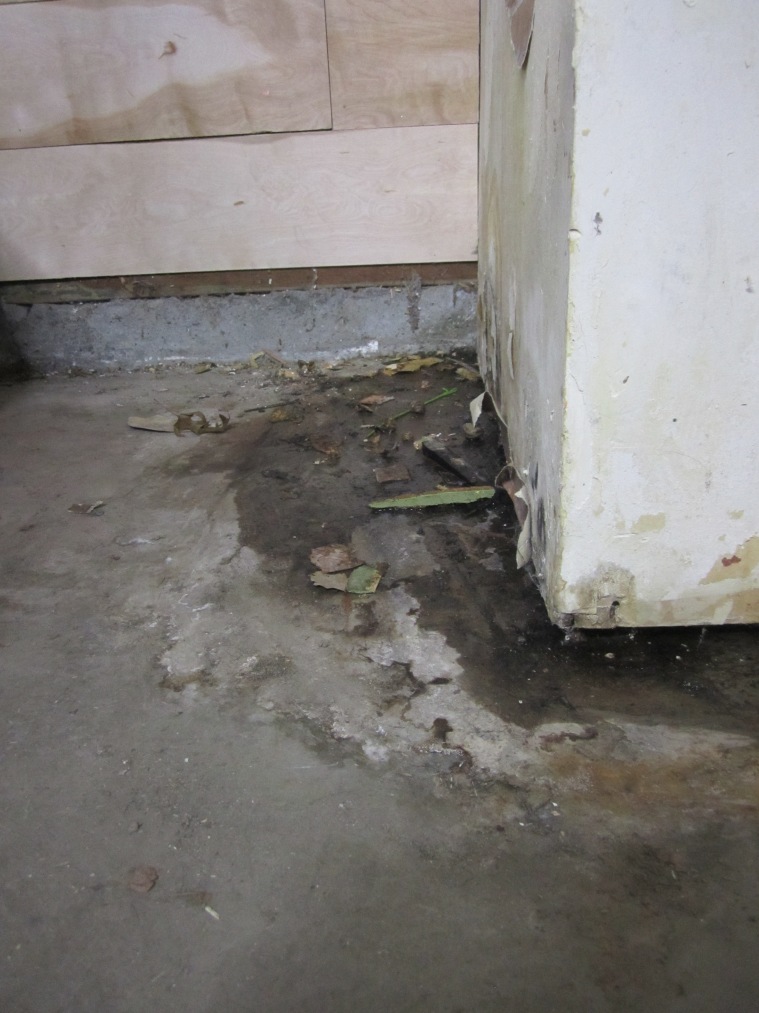
The last prep work before installing the shiplap was a leak we discovered. Such a depressing discovery. We knew something was going on because there was always water near our dryer, but we didn’t really worry about it. It was never a lot. Turns out our water heater has a leak. It’s not even in the garage, but it is connected. The sheetrock looks like it is in decent condition, but we will probably remove the bottom two feet of it in that area. So while the hubby is taking care of the water heater, I can get to work on the rest. Thank goodness!
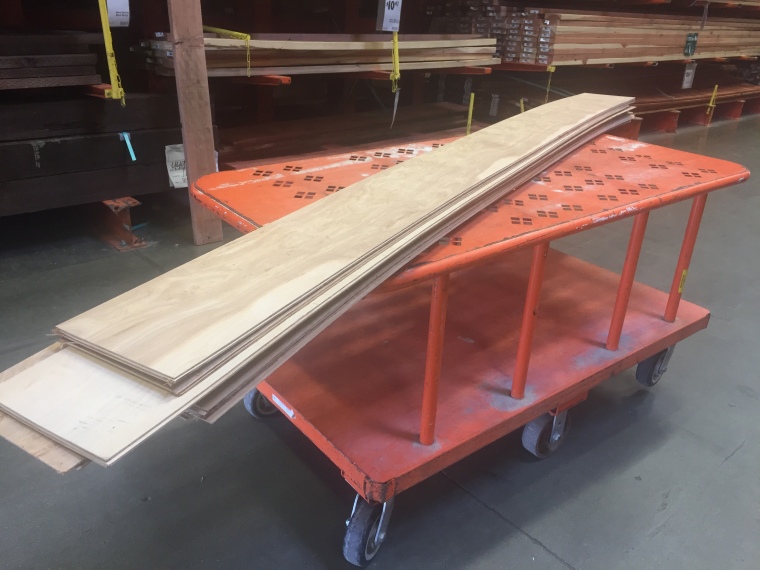
If you look closely you can still see a snail or two that have made this nice area their home.After clearing everything out and getting prepped, we headed over to Home Depot to pick up the plywood for the shiplap. I chose to get 7/32-inch-thick plywood and the employees at Home Depot were able to strip the plywood into 8-inch strips. It was so thin that they cut all 5 sheets at once. I was so glad they did that for us. It would’ve taken us forever at home. Especially since it was raining all weekend.
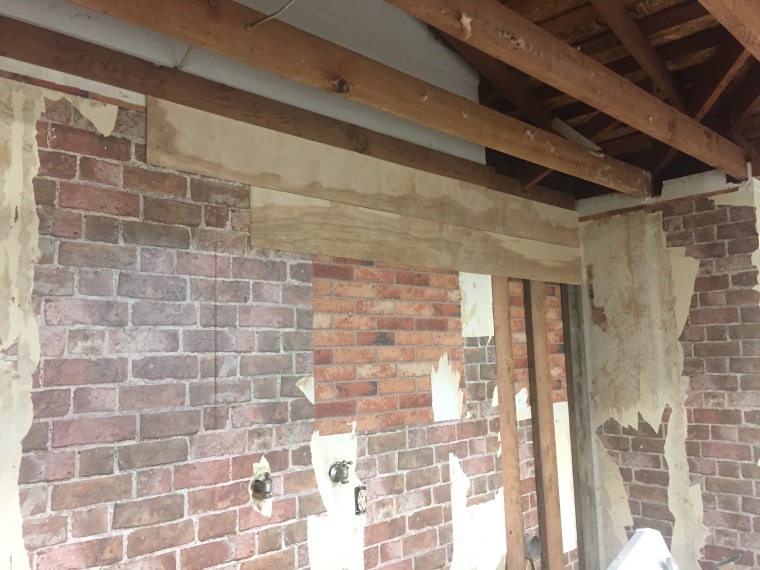
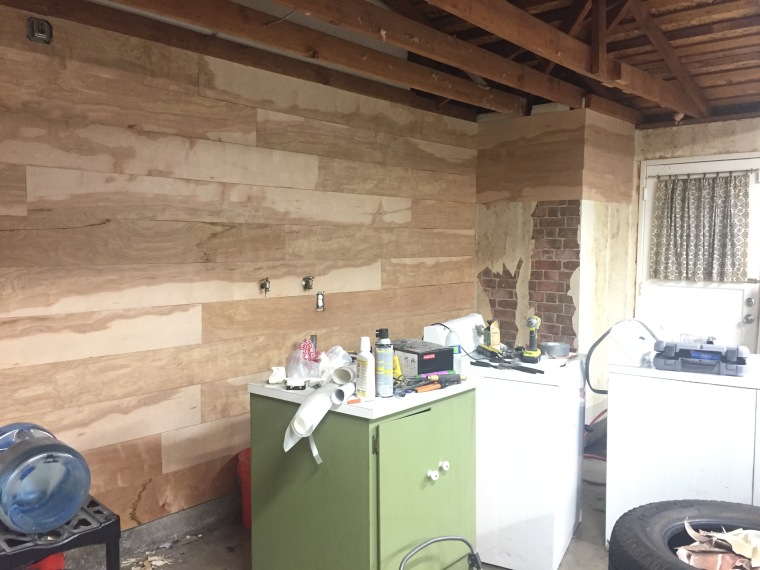
Once we got everything back home, I quickly marked out all of the studs and checked how level the top beam was (which was surprisingly perfect) and used it as a guide. I attached all of the plywood with a nail gun, and used finishing nails as a spacer between boards. The best part of all of this? I was able to cut the plywood with an exacto knife! I scored each edge that I needed to cut and just snapped the boards where I needed. Again, the rain was really deterring me from going outside to use the table saw in my craft room. The trickiest parts were working around all of the permanent wall attachments. The hubby was able to use a Dremmel to cut out a hole for the doorbell, and I used the same technique for all of the pipes and electrical outlets. This was the best guide I found on how to install a shiplap wall and it had some incredible tips. I plan on following Sarah’s advice and finishing all of the edges, but I won’t worry about the top and bottom edges. But I’m not quite there yet – to finish the two smaller sections we need to replace the water heater, so that won’t happen until we are able to get that taken care of. I was giddy with excitement once I finished the long wall!
First boards up!I love it! I couldn’t help but wrap a couple of boards around the smaller sections.This next week should be pretty fun! I need to paint the shiplap, and I really hope it doesn’t take me too many tries to find the perfect white. It needs to be warm, but not too yellow. Fingers crossed! The hubby will need to run some electrical wiring for the new water heater, and we will also need to run some wiring to install some sort of overhead lighting in this area. The overhead lighting wiring shouldn’t be too tricky since everything is currently open, but the wiring for the water heater will probably be a little more difficult. Of course, I will keep you all updated next Thursday!
First off, how cute is Kona?! The cutest! And secondly – you are inspiring me with this makeover. Such awesome progress you’ve made so far! I need your energy juju to complete our laundry room and ours is much, much smaller! OOO-WEE! Can’t wait to see your reveal!


First off, how cute is Kona?! The cutest! And secondly – you are inspiring me with this makeover. Such awesome progress you’ve made so far! I need your energy juju to complete our laundry room and ours is much, much smaller! OOO-WEE! Can’t wait to see your reveal!
Thanks! It may have taken us 3 years to get started, but now that we have there’s an adrenaline rush (or something) to finish!
i love those wide boards you used! looks awesome!
Thanks! I was going between 6-inches and 8-inches, but I figured 8-inches would make a bigger statement.